Paid Listings for WP Car Manager powered by WooCommerce. Setup purchasable car listing packages which can be purchased during frontend car submission.
Installation
- Unzip and upload the plugin’s folder to your /wp-content/plugins/ directory
- Activate the extension through the ‘Plugins’ menu in WordPress
For more information on installing and managing plugins see here
Setup
Before installing and activating the extension, make sure you have the following plugins active:
- WP Car Manager version 1.3.0 or higher
- WooCommerce version 2.5.0 or higher
If you’re installing WP Car Manager for the first time, it’s important you follow the onboarding steps offered to you after activation. The onboarding screen offers you the possibility to create all (3) needed pages for WP Car Manager to function properly. We highly advise you let the onboarding screen create these pages.
If you’re installing WooCommerce for the first time, it’s important you follow the onboarding wizard it provides upon installation. This makes sure all the needed pages are created as well as making sure your settings like currency and country are setup correctly. The onboarding wizard also helps you setup your payment gateway(s), which you’ll need to start selling car listings.
After you’ve installed, activated and correctly setup the plugins described above, you can install and activate the Paid Listings extension.
Usage
Setup the Car Listing Package
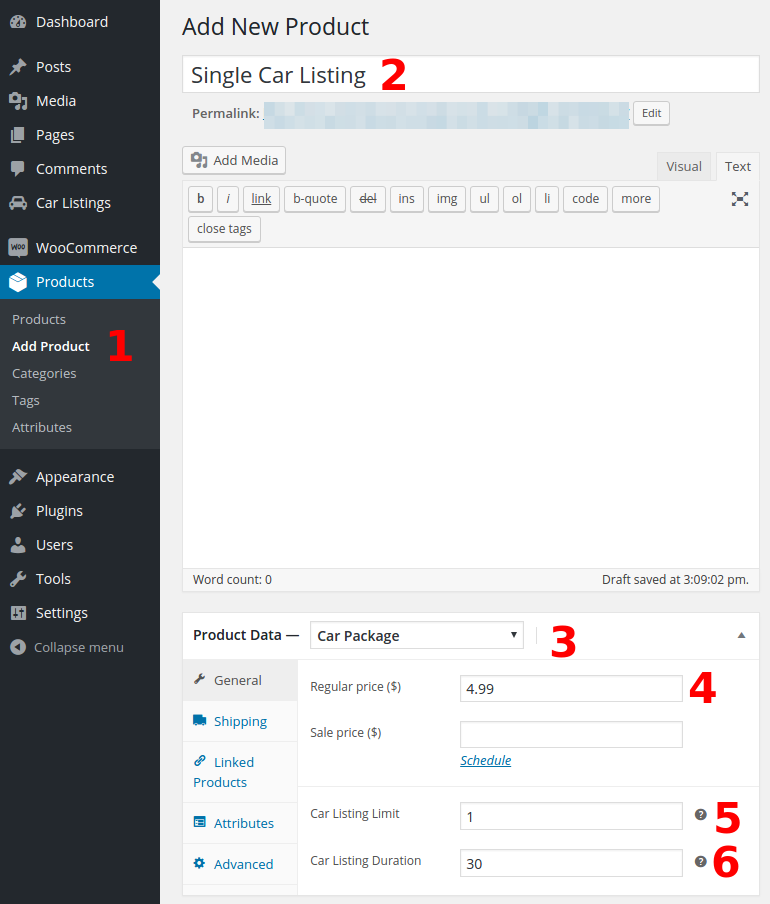
Before you can start selling Paid Car Listings, you will need to create at least one Car Package WooCommerce product. We’ve described the steps to do so below, each step is numbered and has a corresponding number in the image.
- In the WordPress admin menu, go to Products > Add Product
- Enter a title for your Car Listing Package, this will be displayed on your website as well.
- Select the Car Package as product type.
- Set the price of your Car Package.
- Set the amount of car listings someone can place with this package.
- Set the duration of the car listing(s) in days.
You can create as many Car Packages as you like by repeating these steps. You can for example create a Car Package which allows someone to list one car for 30 days for $4.99 and create a Car Package that allows someone to list five cars for 30 days for $20.99. This way you can offer your users discounts if they pre-purchase a larger amount of listings.
Setup Car Submission Settings
Although optional we do recommend you have a look at the Submission settings before you start offering paid listings on your website. WP Car Manager and its Paid Listing extension come with default values that are correct for most websites but we recommend you go over them and confirm them.
You can view your Car Submission settings by going to Car Listings > Settings in the WordPress admin menu. In the settings screen, click on the Submission tab.
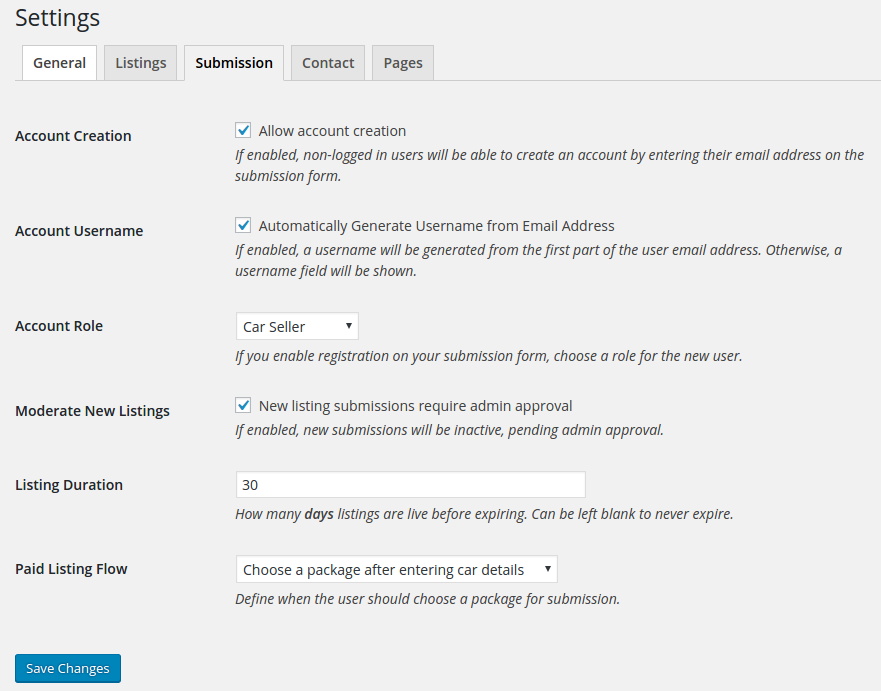
After confirming the submission settings, or changing them and saving your changes, your website is ready to start selling car listings. If you used the WP Car Manager onboarding page, a page is created named Submit Car. On this page your users can submit their vehicles, select one of the Car Listing Packages you created and pay via WooCommerce using one of the WooCommerce payment gateways you installed.
Managing User Listing Packages
You can view and manage user purchased listing packages in your WordPress administration panel by going to Car Listings > Listing Packages.
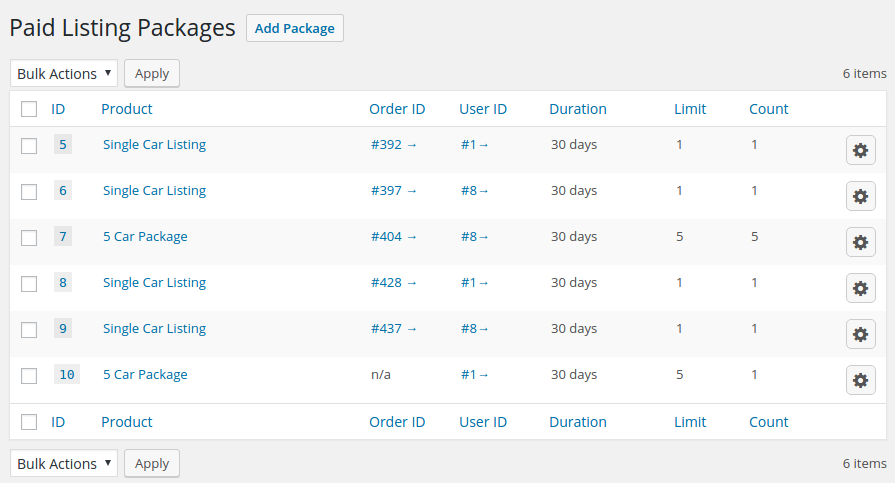
You can a edit a listing package by clicking the wheel icon, located at the end of each row. At the listing package edit screen you can change any data of a Listing Package you like. It’s recommended not to manually change Order ID’s, unless you know what you’re doing. This screen is mostly used to alter the limit or count of listing packages.
Adding new listing packages to users can be done by clicking the Add Package button located right of the page title (Paid Listing Packages).
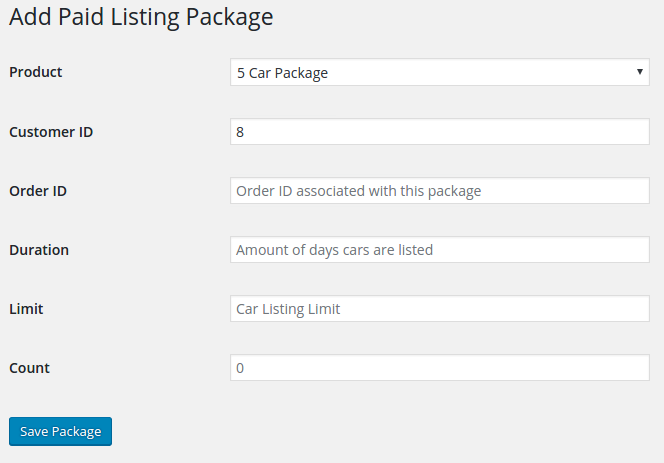
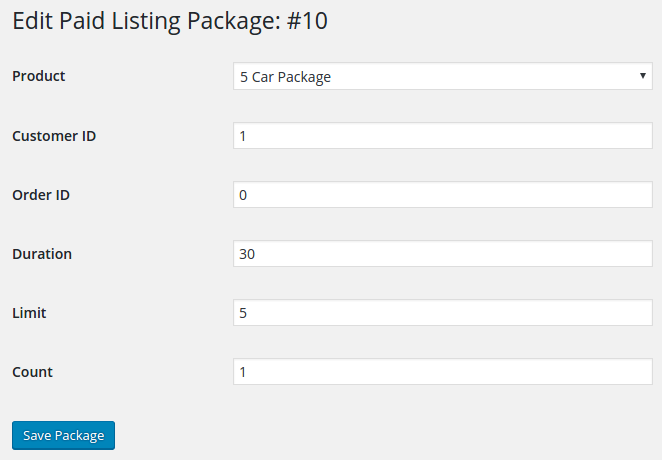
The product and Customer ID fields are mandatory, the rest of the fields are optional.
If you choose not to enter a WooCommerce Order ID, the user package will simply not be linked to any order. This doesn’t affect the way the user listing works, it’s simply not linked to any WooCommerce order.
If you choose not to enter a Duration and/or Limit, the duration/limit of the chosen Product Package will be used. Meaning you can leave these fields blank when entering a new package to a user unless you want to have a different value than the Car Package normally has.
The Count field will be set to 0 if you leave this blank, as most newly added user packages will start with 0 listings used.
Customer Usage
After following the instructions in the Setup and Usage section, your users will now automatically be prompted to choose a package when they submit their car via your website.
You can choose whether a user will be prompted to choose a package before entering the car details or afterwards. By default a user is asked to choose a package after entering the car details, you can change this at the Paid Listing Flow setting located in the Submission tab in your WP Car Manager settings.
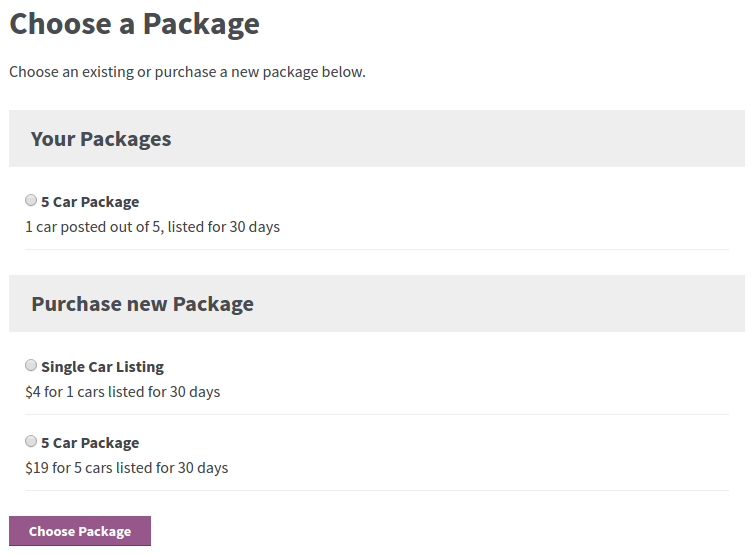
The user will always be offered to purchase any of the Car Packages you created in the Usage section. The user will also be offered all Car Packages that they own that still have available listings on them.
If the user chooses one of their own packages, the listing will be submitted and a listing will be subtracted from their package. If the user chooses a new listing, they will be redirected to the WooCommerce checkout page which will have the selected Car Package in their cart. On the checkout page they can fill out the required personal information, select a payment method and do the payment. After the payment is complete the package will be added to the user’s account and their listing will be submitted.
Depending on your WP Car Manager submission settings, the listings will be published immediately or will be pending for administrator review.
FAQ
When does the expiration date gets set?
The listing expiration date will be calculated and set when the listing gets published. Depending on your submission settings this will be done immediately after payment or whenever and administrator approves the listing.
Note that the amount of days a listing receives is saved upon purchasing the listing. So if someone purchases a package that includes listing for 30 days today and you change the listing duration to 20 days tomorrow, the user will still receive 30 days listing(s).